SETTINGS
Click the gear icon in the top left corner to open the Check-In App settings. There you can select the active event, view the timestamp of the last data synchronization, and assign your device a unique name as well as a location, so it is always traceable who checked in which guests and where.
Although the app also works offline, you should connect it online regularly to ensure that all data remains up to date across all devices.
QR GENERATE / SCAN EVENT SETTINGS
Configure the app once on a single device, including all preferred settings such as print parameters and alert options. Then conveniently transfer this configuration to any other smartphone via an automatically generated QR code.
Important: The additional devices must already be assigned to the same company and the same event.
This way, your entire team can work with identical, ready-to-use presets within seconds.
CHECKIN OPTIONS
API CHECK BEFORE CHECKIN
If the switch is enabled, the Check-In App continuously synchronizes with the guest list in the Suite. With a weak internet connection, you can turn it off to noticeably speed up the app.
ENABLE STATUS CHECK
Activate the status check if needed to ensure that only guests with the desired status can be checked in.
Once this function is enabled, you will receive a clear warning during check-in if the selected guest does not have the required status. To set this up, tap Select Allowed Status, choose one or more statuses from the list, and confirm your selection.
The statuses you have defined will then appear below, allowing you to always see which categories are permitted for check-in.
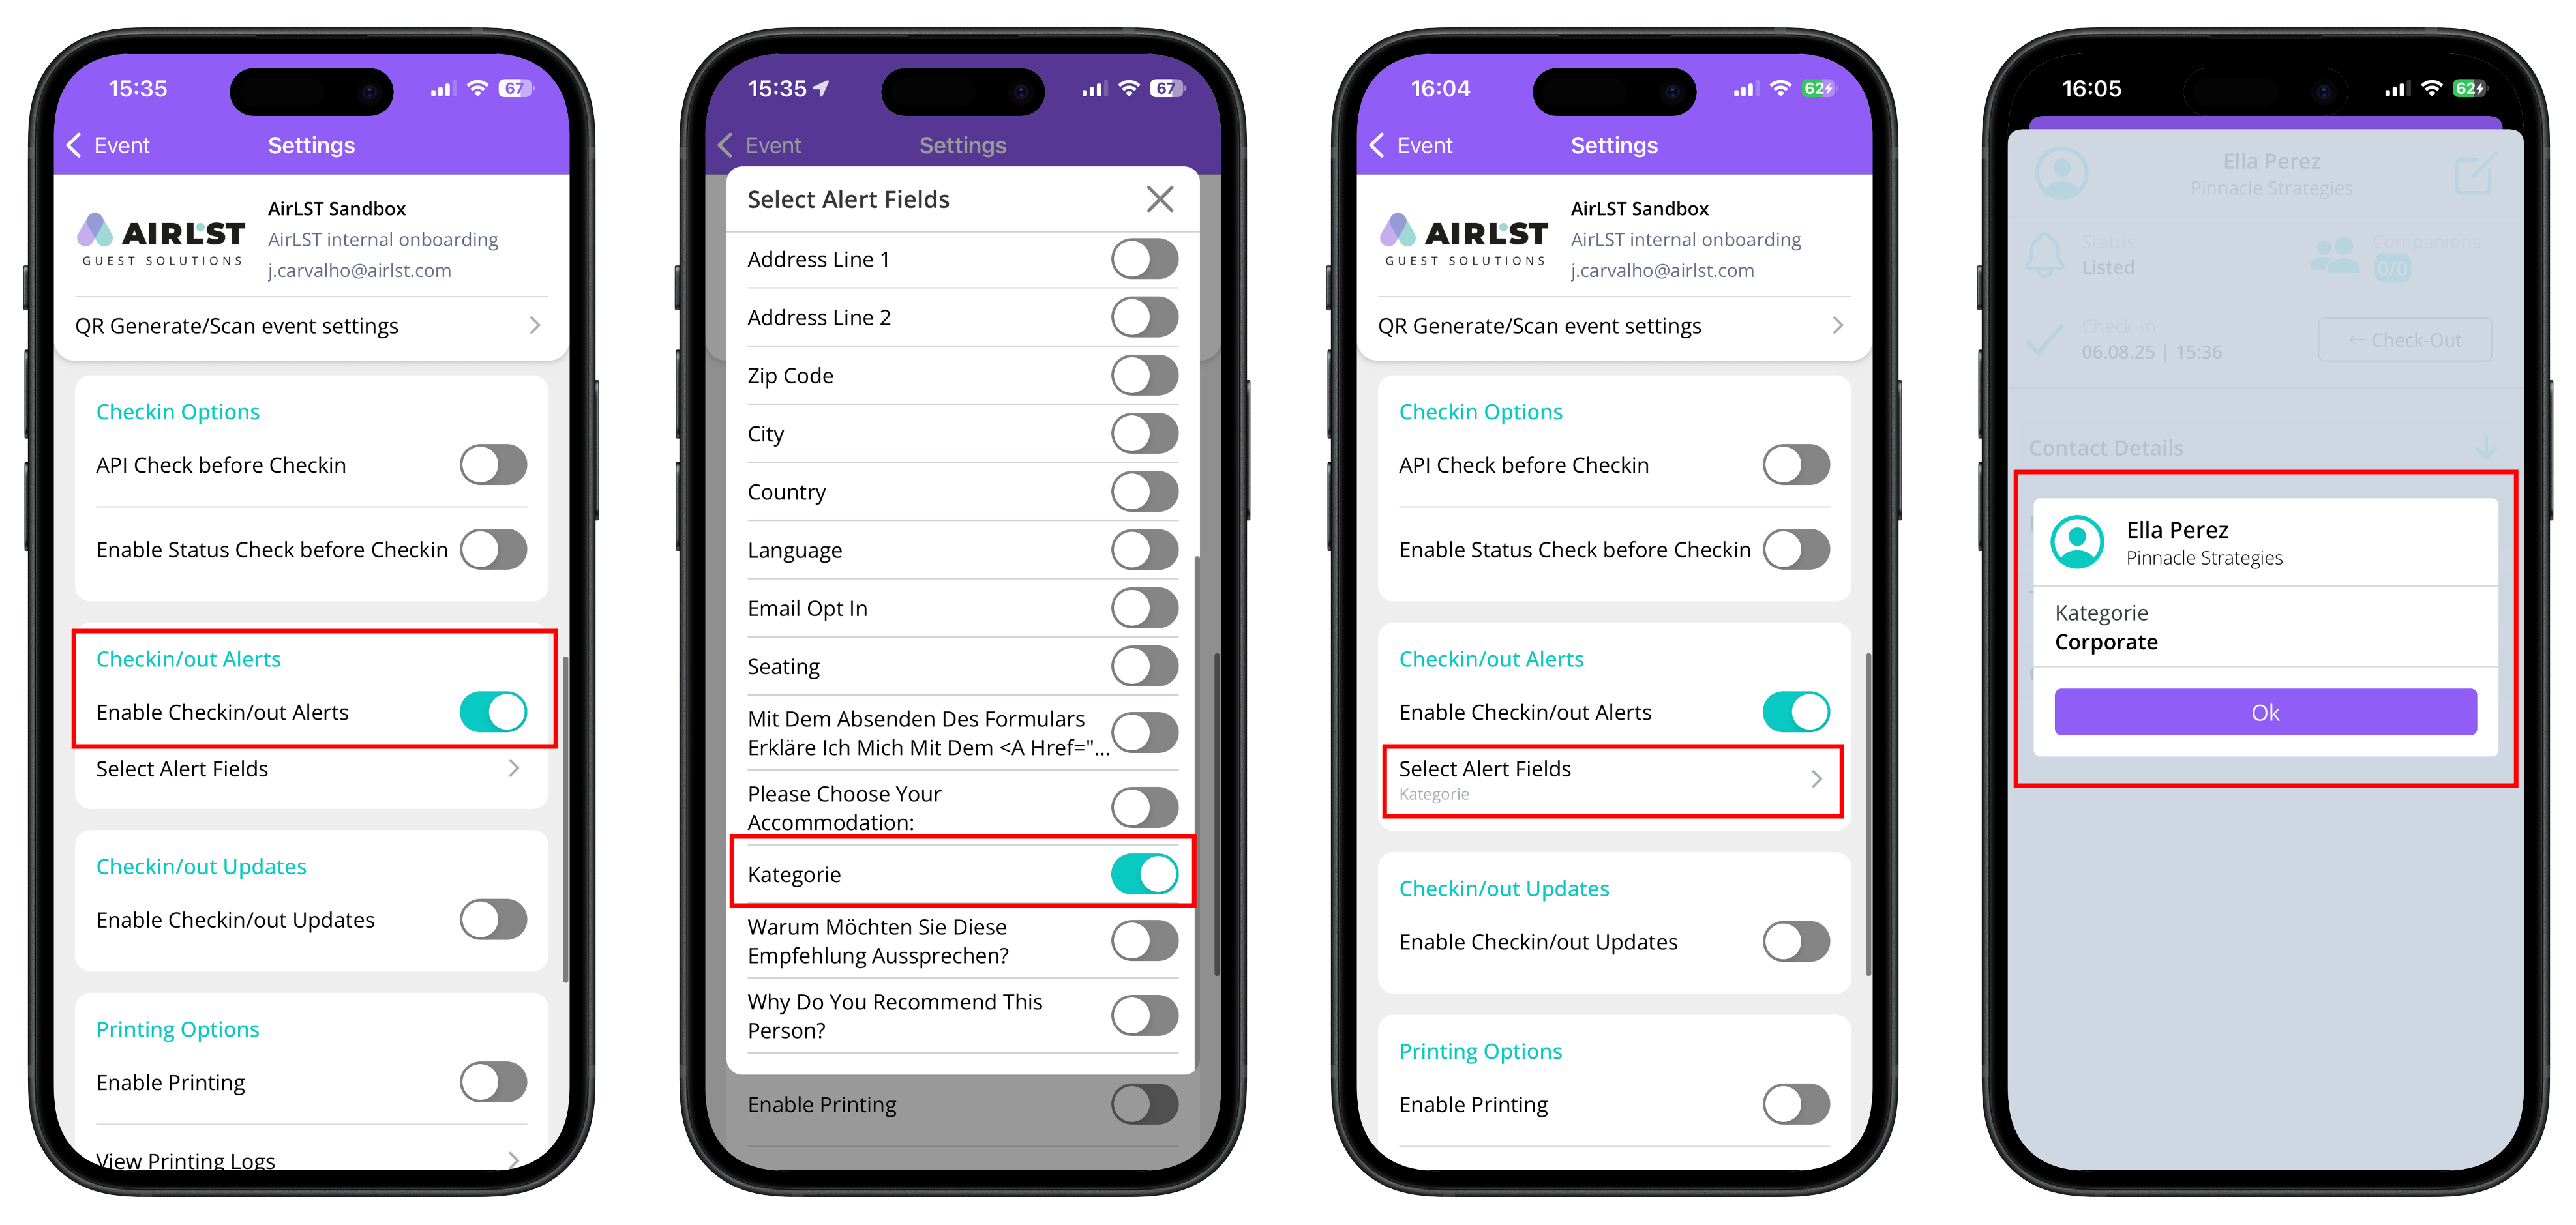
CHECKIN/OUT ALERTS
ENABLE CHECKIN/OUT ALERTS
Enable guest notification to immediately display all important information about a person during check-in. To do this, open the Select Alert Fields tab and select the data fields you want to be visible at entry. At the bottom of the tab, you will then see an overview of the selected fields.
Important: Please note that a field will only be displayed during check-in if a value is actually stored in the guest record.
This way, for example, you can clearly highlight VIP guests, and your team will receive the relevant information exactly at the moment the guest is checked in.
CHECKIN/OUT UPDATES
ENABLE CHECKIN/OUT UPDATES
Enable the toggle if you want to directly add or correct certain guest data during entry. To do this, open the Select Update Fields tab, choose the fields that should be editable during check-in, and confirm your selection.
The fields you have selected will then be displayed at the bottom of the tab. This way, you can, for example, immediately add a missing job title and keep your guest list always up to date.
PRINTING OPTIONS
ENABLE PRINTING
You can find a detailed guide on this here.
ADDITIONAL OPTIONS
SCAN TO CHECKOUT
Enable the QR code scan exclusively for check-out so that the system immediately interprets a scanned code as a check-out. This eliminates the intermediate step of status verification, making the entire check-out process significantly faster – especially helpful when many guests leave the event at the same time.
ENABLE MULTI CHECKIN
Check in entire groups – multiple guests along with their companions – even faster and thus significantly speed up the admission process.